Our social:

Latest Post

Saturday, July 30, 2016

Yotam Ottolenghi’s summer salads to make you smile

Perk up your plates, and your mood, with a cheery summer salad

I was feeling a bit gloomy the other week, thanks to heavy rain and the big shadow cast by all the goings-on in government. But then I came across Molly O’Neill’s A Well-Seasoned Appetite (Penguin, 1997) and cheered up no end.

As the title suggests, the book is pegged around the joy of eating the right food in the relevant season. “When the air grows heavy and the human spirit wilts,” O’Neill writes (be that due to actual summertime humidity or a metaphorical political cloud), “a salad is the best revenge. A seemingly innocent tangle of greens is neither gentle nor mild. It is alive. Fierce both in its inherent crispness and in the varying pepper of individual varieties, it appeals to the brutal side of the summer appetite. Eating a salad is like cracking a whip against languor and ennui. Salad emboldens.”

Those are big claims for small leaves, I know, but they restored my appetite, and helped me decide to spend the rest of summer hiding in the vast array of ingredients that go under the umbrella term “salad”.

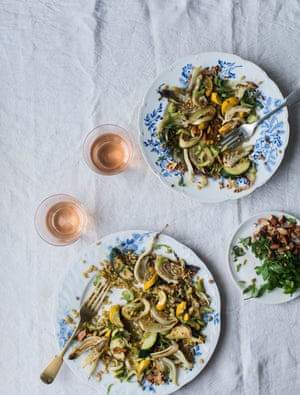
Courgette and samphire

A mix of green and yellow courgettes looks great here, but use just green, if that’s all you have. If you have one, use a mandolin to cut the courgettes nice and thin. Serves six.

300g podded edamame beans (fresh or frozen and defrosted)
2 green courgettes (450g), cut into 0.5cm-thick slices
2 yellow courgettes (550g), cut into 0.5cm-thick slices
90g samphire, broken into small lengths
1 tbsp poppy seeds
15g tarragon leaves, roughly chopped
100g soured cream, to serve

For the dressing
2½ tbsp lemon juice 
1½ tsp Dijon mustard
Salt
60ml olive oil
2 tbsp soured cream

Bring a large pot of salted water to a boil, blanch the edamame for three minutes, until cooked but still with a bite, then drain, refresh under cold water and set aside to dry. Once dry, put in a large bowl with all the other salad ingredients, except the cream.

For the dressing, put the lemon juice and mustard in the small bowl of a food processor, add three-quarters of a teaspoon of salt, then, with the motor running, slowly pour in the oil and mix until emulsified. Add the soured cream, work briefly to combine, then pour over the salad and toss. Arrange on plates (or one big platter), add a spoonful of soured cream on top and serve.

Sweetheart cabbage, asparagus and horseradish

This is great with smoked fish. If you can’t get hold of lovage, buy a bunch of celery with its leaves still intact, and use those instead. Serves four.

1 sweetheart cabbage, central stalk removed, the rest cut widthways into 0.5cm-thick shreds
250g asparagus, woody ends discarded, cut 2-3mm thick on an angle
2 celery stalks, cut 2-3mm thick on an angle
10g lovage leaves (or 15g celery leaves)
5g dill, roughly chopped
10g tarragon leaves, roughly chopped
30g parmesan, finely shaved
Salt and black pepper
For the dressing
2 lemons
2 tbsp olive oil
20g finely grated horseradish
1 small garlic clove, peeled and crushed
80g soured cream

First make the dressing. Top and tail one of the lemons, then cut down the sides, following the natural curves, to remove the skin and pith. Holding the lemon over a small bowl, cut between the membranes to remove the individual segments, then tear each segment into two or three pieces and drop into the bowl. Squeeze two tablespoons of juice from the second lemon and add to the bowl, then add all the other dressing ingredients, mix in a half-teaspoon of salt and plenty of pepper, and set aside.

Bring a large saucepan of salted water to a boil, add the cabbage and blanch for a minute. Drain, refresh under plenty of cold water, then shake and set aside to dry. Once dry, transfer the cabbage to a large bowl.

To serve, add all the remaining salad ingredients to the cabbage bowl, pour over the dressing and toss to combine.

Fermented carrot, radish and kohlrabi

Serve this as a condiment (with grilled meat or oily fish, say, or in a cheese or roast beef sandwich, or with plain rice, and so on) or eat it as it is, as a side salad or snack. It lasts for a long time in the fridge (a couple of months, at least), so you’ll have plenty of time to experiment and try it out with all sorts. Temperature plays a big part in how quickly the vegetables will ferment (the warmer the room, the quicker the process) but here a slower ferment in a cooler room is preferable, because that produces a better flavour. The vegetables will have a distinct aroma when you open the jar, and may also emit gases and/or bubbles, but that’s perfectly normal and to be expected. Once refrigerated, the fermentation process slows down and the texture and flavour stabilise. Make sure you use a sterilised jar and clean utensils, otherwise you risk introducing bad bacteria that will cause your ferment to spoil. Serves six as a condiment or four as a salad.

2 carrots, peeled, trimmed and cut into long, thin strips with a vegetable peeler
200g radishes, tops removed and cut into 2mm-thick slices (use a mandolin, if you have one)
1 kohlrabi, peeled, cut in half and then thinly sliced into 2mm-thick rounds (again, use a mandolin if you can)
1 tbsp flaky sea salt
1 garlic clove, peeled and thinly sliced
1 tsp fennel seeds, toasted

For the salad
15g coriander leaves, roughly chopped
10g mint leaves, shredded
1 tbsp olive oil
50g rocket
1 medium pink lady apple, cored, quartered and cut into 2mm-thick slices

Put the carrot, radish and kohlrabi into a medium bowl, add the salt and rub together using your fingers – the salt and massage help the vegetables release their juices. Add the garlic and fennel seeds, mix well and transfer to a plastic container big enough to hold all the vegetables snugly but with space for at least 2cm of air at the top. Squash down the vegetables to release more juices (you should now have enough liquid to cover them completely)  then lay clingfilm over the surface of the veg (if need be, use a weight to keep them submerged) and put the lid on the container. Leave to sit at room temperature for about five days, giving the vegetables a stir each day with a clean fork and also a squash down, to encourage them to continue releasing juices. After day three, taste the ferment every day, to make sure you are happy with its strength: it will get stronger with every day that passes. Once you’re happy with the flavour, transfer to a sterilised jar and keep in the fridge.

To make the salad, strain the fermented vegetables and put them in a large bowl. Add all the other salad ingredients, toss and serve.

Mechouia

Yotam Ottolenghi’s mechouia.
Yotam Ottolenghi’s mechouia. Photograph: Louise Hagger for the Guardian. Food styling: Emily Kydd. Prop styling: Jennifer Kay

In this Tunisian classic, burning the vegetables on a ridged griddle pan (or over an open flame on a barbecue) is a surefire way to introduce a tonne of smoky flavour. An hour may seem like a long time to leave vegetables to char, but they can be left to do so while you get on with something else. (If charring indoors, remember to ventilate your kitchen.) Mechouia is lovely with pitta for scooping it up, or serve with grilled fish or meat for a more substantial meal. It keeps in the fridge for three days. Serves six to eight, as part of a mezze.

2 large aubergines
2 red onions
2 large red peppers
6 tomatoes
2 mild red chillies
75ml olive oil
1 small garlic clove, peeled and crushed
1 tbsp good-quality sherry vinegar
Salt
1 tsp urfa chilli flakes, to serve (optional)

Put a large, ridged griddle pan on a high heat (if you have two griddle pans, use both to speed things up). Put the whole aubergines, onions and peppers on the hot pan(s), all skin on, and cook for about an hour, turning every 15 minutes, until well charred and completely cooked through. Remove from the pan and leave to cool. Repeat the process with the tomatoes and chillies, cooking those for about 20 minutes and turning every five, then remove from the pan and leave to cool.

Peel and discard the charred skins of all the vegetables and remove the seeds from the peppers and chillies. Roughly chop the cooked vegetables, then put them in a large bowl, along with any juices. Add the olive oil, garlic, vinegar and a third of a teaspoon of salt, mix well and leave at room temperature for a couple of hours, to let the flavours develop.

To serve, give the mechouia a good stir, transfer to a large plate or shallow bowl, and sprinkle with chilli, if using.

Yotam Ottolenghi is chef/patron of Ottolenghi and Nopi in London.

Friday, July 29, 2016

Cocktail of the week: the marguerite – recipe

Before the dry martini, there was the marguerite: here’s how to make a classic at home

This forefather of the dry martini, first seen in Harry Johnson’s legendary Bartenders’ Manual in 1888 favours English dry gin, dry vermouth and orange bitters, rather than the sweeter gin, vermouth and bitters of most classic martini recipes.

40ml gin (Plymouth, ideally)
40ml dry vermouth (Noilly Prat, ideally)
2-3 dashes each anisette
2-3 dashes orange bitters
1 piece lemon peel
1 cocktail cherry, to garnish

Fill a mixing glass with crushed ice, add all the liquids, stir and strain into a chilled cocktail glass. Twist the lemon over the top and discard, then garnish with a cocktail cherry.

The Manhattan: The Story Of The First Modern Cocktail, by Philip Greene, is published by Sterling at £12.99. To order a copy for £10.39, go to bookshop.theguardian.com, or call 0330 333 6846.

The weekend cook: Thomasina Miers’ artichoke heart recipes

When artichokes are in season, I always eat them in as many ways as I can

My uncle and aunt lived in Wales, and my memories of summer holidays there are full not only of the buzzing of bees and the whirring of the lawnmower, but also of the tall, spiky plants in their garden that bore a strange, exotic vegetable. Artichoke suppers were a family tradition: we’d eat them with beurre noir, dunking in the leaves, then the hearts, before mopping up the butter with bread. It was a brilliantly economical supper for my mother, who turned it into a ritual that we came to love.

I now eat artichokes in as many ways as I can when they’re in season. If you need just the hearts, as for today’s recipes, boil them whole and have the leaves as a cook’s perk, or as a starter; otherwise buy ready-prepared hearts in jars or tins.

Artichoke heart and summer vegetable tempura with honey saffron mayonnaise

There’s no great secret to tempura batter: use a deep pan so you don’t need as much oil, and get it up to heat before frying. Serves six to eight.

2 courgettes
1 small aubergine
8 artichoke hearts
1 handful fresh sage leaves (optional)
Salt and freshly ground black pepper
Sunflower or vegetable oil, for frying

For the mayonnaise
1 garlic clove, peeled and finely chopped
2 egg yolks
½ tsp honey
1 tbsp white-wine vinegar
Juice of 1 lemon
500ml sunflower oil
1 big pinch saffron threads, soaked in 2 tbsp hot water for 30 minutes

For the batter
2 free-range egg yolks
About 350ml iced sparkling water
200g self-raising flour
1 tsp cornflour

Start with the mayo: whizz the garlic, egg yolks, honey, vinegar and a tablespoon of lemon juice in a food processor for 30 seconds, then, with the motor running, slowly drip the oil through the funnel until the mixture starts to thicken and emulsify. With the motor still running, now pour in the rest of the oil in a thin, steady stream, then add the saffron and its soaking liquid. Season, then stir in lemon juice to taste: you want a bright and lemony mayo that’s not too acidic. If it’s a bit on the thick side, loosen with a tablespoon of cold water.

Cut the courgettes and aubergine into two-bite pieces and cut the artichoke hearts in half. Whisk the egg yolks for the batter with the fizzy water, then stir in both flours, but only just to combine: you want some lumps, because they’ll help with the crispness. Add the vegetables and sage, if using.

Fill a narrow, heavy-based pan with enough oil to come 5cm up the sides and heat to 180C (if you don’t have a thermometer, that’s the stage when a cube of bread browns and crisps within 30 seconds). Frying each different vegetable at a time, lift them out of the batter and fry in batches so as not to overcrowd the pan. Cook until crisp and pale gold all over, then transfer to a plate lined with kitchen paper and season with salt. Keep warm and repeat with the other veg. Serve hot with the mayo alongside. (Alternatively, fry everything in advance and reheat in a hot oven: the tempura won’t be as light and crisp as it is straight from the fryer, but it’ll still be very good.)

Artichoke heart, pea and broad bean stew with soft polenta

Thomasina Miers’ artichoke heart, pea and broad bean stew with soft polenta.
Thomasina Miers’ artichoke heart, pea and broad bean stew with soft polenta. Photograph: Louise Hagger for the Guardian. Food styling: Emily Kydd. Prop styling: Jennifer Kay

This comforting, silky stew is a celebration of summer vegetables, and definitely worthy of a good bottle of olive oil and fresh parmesan, which will transform it into a bowl of rich, savoury flavours. Serves four.

25g butter
2 tbsp extra-virgin olive oil
3 shallots, peeled and thinly sliced
3 garlic cloves, peeled and thinly sliced
Salt and freshly ground black pepper
A few sprigs fresh thyme, leaves picked
1 sprig rosemary, picked and chopped
2 bay leaves
2 globe artichokes hearts cut into 2cm-wide chunks (or 200g jarred artichoke hearts, drained)
200ml white wine
250g podded broad beans (fresh or frozen)
250g podded peas (fresh or frozen)
1 big handful fresh mint leaves, finely chopped
1 big handful fresh parsley leaves, finely chopped

For the polenta
250g quick-cook polenta
50g butter
60g grated parmesan, plus extra to serve
Extra-virgin olive oil, to serve

Heat the butter and oil in a wide, deep pan, add the shallots and garlic, and season generously. Fry on a medium heat until the shallots are softened, about five minutes, then stir in the thyme, rosemary, bay, artichoke hearts and wine. Bring to a boil and simmer for three minutes. If you’re using fresh artichoke hearts, now add 100ml water, cover and simmer until they are tender, for about 12 minutes, before adding the beans and peas; if you are using jarred or tinned hearts, don’t add any extra water, and just stir in the beans and peas after you have simmered the hearts, wine and herbs.

Leave the stew to simmer for four to five minutes, until the beans and peas are tender, then lift out and discard the bay leaves. Stir in the mint and parsley, and adjust the seasoning to taste.

Make the polenta according to the packet instructions and, when ready, stir in the butter and grated parmesan. Season to taste, then spoon into shallow bowls. Top the soft polenta with ladles of the stew and serve with a wedge of parmesan, a bottle of good extra-virgin olive oil and a pepper grinder, so that people can dress their bowls with extras of all three.

And for the rest of the week…

The saffron mayo is great with fish: dollop some on a simple cod stew with tomato and fennel (and maybe more saffron), and serve with crostini, say; or use leftovers for dunking artichoke leaves, or in fish finger sandwiches, or even in a posh egg mayonnaise. The stew keeps for three to four days in the fridge; its vivid, green colour will fade, but the flavour gets better and better.

Thursday, July 28, 2016

Seafood saganaki and stuffed squid recipes inspired by Crete

Memories of the Aegean inspire our new resident to conjure the flavours of her family’s seafront cafe in Crete, starting with a sweet-sour seafood saganaki and an irresistible recipe for baked stuffed squid

When you have grown up in a place you can forget the beauty of it. You take it for granted. Sometimes you even find it boring, want to leave and cross the seas for new adventures.

Then, as the years go by, you find yourself looking around when you go back to visit. You marvel at the beauty of it all, almost incredulous that you spent your childhood there.

I was born in Chania, Crete. My Cretan father is a fisherman and my Scottish mother was in charge of running our seafood restaurant – Akrolimano was its name, meaning “the end of the harbour”, which is exactly where it was. Our days were spent around the water or talking about the sea, the weather, the wind. Oh, the wind, is it strong? Is it workable? Can dad go fishing? Will we have enough fish for the restaurant? So many conversations about the wind! To this day, when it’s windy in London, I think of my dad on his fishing boat in Crete.

We were one of the luckiest families around. We ate fish every day, fish caught by my dad’s hands; one man in a small boat. He fished alone all night long. When he came back in the morning, he would often ask me to cook him some fish before he went to rest. When really little I would have to climb on a chair to reach the sink, clean the fish completely and fry it. (Having fish for breakfast is a good start to the day.)

Later on in the day came the preparation of bait for the next night’s fishing. It always had to be the freshest bait available, because the fish were picky. Sometimes it was octopus or squid, others it was anchovies, sardines, prawns, sea cucumbers or limpets. Limpets were the hardest to prepare as their stiff little bodies were so resistant to abandoning their shells.

The rituals would continue when mum came back from the market with a haul of octopus for the restaurant. We would clean it and hang it on our washing line to dry in the sun until the early evening. First, you slit the hood open so it is flat, then you make another slit from the base of the hood to the mouth, remove the beak and then slice inbetween two legs so that the whole octopus lies flat. You put the octopus in a large bucket and take it to the washing line to hang. Each octopus needs four pegs. Two for the hood, and two for the first two legs on either side of the hood. We would let it hang for 4-5 hours under the hot sun.

By this time, the octopus was stiff and dry and perfect for what was going to happen next. When the charcoal was lit and the coals were red and hot, but without flames, we would put each octopus on a charcoal grill for about 40‑45 minutes, turning it every so often so it didn’t burn. When ready, we simply served it with a quarter of a lemon and that was it.

Marianna Leivaditaki smashes into some prawns.
Marianna Leivaditaki: ‘In the summer months, when we could get amazingly fresh prawns, we would make the saganaki, a cheesy appetiser prepared in a small frying pan.’ Photograph: Elena Heatherwick for the Guardian

I can still smell the aromas of our restaurant’s kitchen. Everything was so fresh and cooked so simply. There was no oven in our kitchen, just the 5-metre-long grill that stretched from one side to the other. At around 6pm, the grill would be full of small cuttlefish, slowly cooking over the charcoal until tender and golden brown. When the orders would start coming in we would stuff their alien little bodies with amazing fresh cheese and aromatics and put them back on the grill until everything had melted. It was such a fun dish to create and everyone loved it.

In the summer months, when we could get amazingly fresh prawns, we would make the saganaki, a cheesy appetiser prepared in a small frying pan. We would go to the fish market and by prawns by the crate. We would sit around the table and peel them. (We were fast peelers thanks to all the experience we had gained from preparing them for bait.)

We used to make large pots of the sweet onion and pepper base and anyone walking into the kitchen would simply smell and smile ... and then the feta! It was soft and silky made by Marian and her family in a small village outside Chania. It is the best feta I have ever tried. This is my favourite dish on a hot summer night, sitting by the sea and sipping an ice-cold glass of ouzo.

Over the years, and through my experiences away from home, I try to hold on to those initial moments I had with food, which have played such a crucial part in who I am and how I cook today. The opportunity to recreate this for others and offer these flavours – both in Morito and here in print – makes me love my job more than ever.

peeling prawns
‘We would go to the fish market and by prawns by the crate. We would sit around the table and peel them,’ says Marianna. Photograph: Elena Heatherwick for the Guardian

Prawn and mussel saganaki with feta, fennel and ouzo

Serves 4-6
4 tbsp olive oil
1 romano pepper, chopped
1 green pepper, chopped
1 white onion, chopped
1 fennel bulb, chopped
3 garlic cloves, chopped
3 red fresh chillies, deseeded and chopped
1 tsp anise seeds, crushed
Salt and black pepper
500g fresh mussels
200ml white wine
3-4 tbsp ouzo
200g feta
300g fresh cooked prawns, peeled
Parsley, chopped, to serve

1 Start by making the sweet base. Warm a pan over medium heat. When hot, add 4 tbsp olive oil followed by the peppers, onion, fennel, garlic, red chillies and anise seeds. Season with salt and pepper, lower the heat and cover the pan. Cook for about 15-20 minutes, or until sweet and golden.

2 Meanwhile, add the mussels and wine to a hot pan and cook until they just begin to open. Remove the mussels from their shells and set aside. Keep the cooking liquid. You may need it later to thin the sauce down a bit.

3 Add the ouzo and feta to the base and stir gently until it begins to melt. Add the prawns and mussels and turn off the heat. Sprinkle with chopped parsley and serve with toast.

Cuttlefish stuffed with sun-dried tomatoes, anchovies, goat’s curd and sage

Serves 4-6
600-800g fresh cuttlefish or squid, cleaned but kept whole
2 tbsp olive oil

For the stuffing
4 tbsp sun-dried tomatoes, finely chopped
10 anchovy fillets, chopped
300g goat’s curd
4 tbsp fresh mint, finely chopped
300g chard, chopped finely, plus 2 whole large chard leaves
3 tbsp sage leaves, chopped finely
1 tbsp capers
Salt
3 tbsp olive oil

To garnish
A handful of rocket leaves
Juice of half a lemon
Extra virgin olive oil
Salt

1 Preheat the oven to 200C/400F/gas mark 6. Put all the stuffing ingredients in a bowl together and mix well.

2 Stuff the cuttlefish or squid with the mix and then tuck the tentacles into the opening to seal it.

3 Put the whole chard leaves on the base of a small baking tray and add the stuffed cuttlefish or squid. Drizzle with 2 tbsp oil and sprinkle with salt. Cover with parchment, then bake for around 30 minutes, or until tender.

4 Remove the paper. Put the tray under the grill to get some colour. Serve whole or cut into smaller pieces with some rocket leaves seasoned with lemon juice, olive oil and salt.

  • Marianna Leivaditaki is head chef at London mezze/tapas bar Morito

How to rain-proof your barbecue

Planning a barbecue but worried about the weather? Don’t be put off: follow these tips for great grilling come rain or shine. Plus: recipes you can cook in the oven or over coals

When it comes to great British sports, barbecuing in the rain is right up there with aggressive queueing and passive-aggressive apologising as something we are born to do. Battling the elements, we tell each other as we tog up, is all part of the fun – but this summer is testing even my fondness for grilling in Gore-Tex.

However bad the weather gets, don’t bring your barbecue into the garage or even the kitchen; carbon monoxide poisoning is much, much worse than wet feet. If you don’t happen to have an overhanging roof to keep things dry but well ventilated, invest in a large umbrella that will cover both you and the grill – a sturdy parasol will do the job, and free up your hands to turn the food and drink the beer. Where there’s rain there’s often wind, too, so make sure it’s well weighted down, or you could get a lot wetter once the fire brigade turns up. In really gusty conditions, position your barbecue at 90 degrees to the prevailing gale.

Boy barbecuing in the rain
A hands-free parasol might help … Photograph: Peopleimages/Getty Images

If you’re in the market for a new model, a kettle barbecue with a tight-fitting lid is a wise investment to keep the heat in and the water out. Bear in mind that whichever sort you have, rain will bring the temperature down, so it’s wise to add a little more charcoal than you usually would. Food will take longer to cook, and I find it’s also easier to burn things – mostly because I’m so reluctant to open the lid to check on them.

If the weather looks uncertain, it’s better to have something that can either be cooked in advance and finished on the barbecue, as in the ribs recipe below, or that doesn’t require searing heat, such as the peppers. Save the steak and seafood for another day, and concentrate instead on stuff that can be cooked low and slow without too much interference from the chef; this is the time to break out the brisket, and make the most of side dishes that can be prepared in the kitchen.

Sometimes, however, even the stoutest Brit has to admit defeat and head indoors. Happily, these recipes have been designed to be just as good whether you’re inside or out.

Roasted red pepper and walnut soup, or chargrilled red pepper and walnut salad

Roasted red pepper and walnut soup.
Roasted red pepper and walnut soup. Photograph: Felicity Cloake for the Guardian

Inspired by the smoky, sweet-and-sour flavours of the Syrian muhammara dip, the ingredients for this warm, chargrilled pepper salad work equally well as a warming soup should the weather turn on you. It is vegan-friendly, but also good with feta to make a more substantial meal.

(Serves 4 as a starter or light meal, 2 as a main)
8 large pointed red peppers
4 tbsp olive oil, plus extra to grease
100g walnut pieces
4 pitta, cut into triangles
2 (salad)/4 (soup) smallish garlic cloves, crushed
1 tbsp dried Aleppo chilli flakes, or 1 tsp hotter chilli flakes
1 (salad)/2 (soup) tsp ground cumin
1l vegetable stock (soup only)
2 tbsp pomegranate molasses
1 tbsp lemon juice
Small bunch of coriander, roughly chopped (or you can pick the leaves and leave them whole if you prefer, to make the salad look prettier)

To make the soup, heat the oven to maximum, and put the peppers on a lightly greased tray. Pierce in a couple of places, then roast until blackened in parts and beginning to collapse. Take out of the oven and replace with the walnuts and pitta triangles. Bake for about five minutes until toasted, then set aside. Seed and roughly chop the peppers.

Heat the remaining oil in a large pan over a medium-low heat and fry the garlic for a minute or so, then stir in the spices and cook for 30 seconds. Add the peppers, cook briefly, then pour in the stock. Bring to the boil, then turn down the heat and simmer gently for 10 minutes. Meanwhile, roughly chop the nuts.

Add the walnuts to the pan, then liquidise the soup until smoothish (you can pass it through a sieve if you’re very particular). Stir in the pomegranate molasses and lemon juice and season to taste, adding more of either if required.

Serve garnished with coriander, with the pitta triangles on the side.

Chargrilled red pepper and walnut salad.
Chargrilled red pepper and walnut salad. Photograph: Felicity Cloake for the Guardian

To make the salad, put the peppers on a hot barbecue and cook, turning, until blackened all over. At the same time, put a pan on the grill and toast the walnuts until slightly browned, and the pitta until crunchy.

Whisk together the garlic, spices, molasses, lemon juice and olive oil, and season to make a tangy dressing; taste and adjust quantities if necessary.

Seed the peppers and cut into thick strips. Scatter over a platter and pour over the dressing, then top with the walnuts, pitta and coriander.

Mustard and beer short ribs

Braised mustard and beer short ribs.
Braised mustard and beer short ribs. Photograph: Felicity Cloake for the Guardian

These are great with potato salad if the weather is kind, or buttery mash if it’s not. Short ribs can be found in many supermarkets these days, but a butcher will always be able to get you some.

(Serves 4)
1l hoppy, crisp beer (I used an IPA)
6-8 thick beef short ribs, depending on appetite, with a good amount of meat on them
2 tbsp oil
2 onions, sliced
6 tbsp wholegrain mustard
2 tbsp ketchup

Pour the beer into a wide pan, bring to the boil, then simmer rapidly for about 15 minutes until reduced by half. Meanwhile, pat the ribs dry with kitchen towel and season. Heat the oil over a medium-high heat in a wide, heavy-based pan with a lid, and brown the ribs in batches. Set aside, turn down the heat a little and cook the onions until soft and golden. Scoop out of the pan and set aside.

Add the reduced beer and mustard to the pan and stir to dislodge any bits of meat from the bottom, then put in the ribs, meaty-side downwards (you may need to separate them to fit). Cover tightly and simmer over a low heat for 90 minutes, then add the onions and simmer for another hour, or until the meat on the ribs is tender.

Scoop out the ribs and onion with a slotted spoon. At this point, if you’re making the dish in advance, you can refrigerate the sauce to make it easier to lift off the fat. If not, then spoon off as much as possible. (You’ll also need to reheat the ribs if you’re cooking in advance and not barbecuing; this is best done tightly covered with foil in a medium oven.)

Barbecued short ribs.
Barbecued short ribs. Photograph: Felicity Cloake for the Guardian

If you’re planning to barbecue the ribs, reduce the sauce until thick, then stir in the ketchup. Put the ribs on a medium-hot barbecue until charred all over, then slather with the sauce and cook for another few minutes, until it has formed a sticky crust. Warm up the remainder of the sauce with the onions and spoon on top.

If you’re cooking indoors, reduce the sauce until thick and glossy, and stir in the ketchup and the onions. Cut the meat into chunks, discarding the bones, or shred if you prefer, then serve with the sauce.

Wednesday, July 27, 2016

Nuno Mendes’ summer recipes: seared beef salad with herb puree

This unusual method produces the juiciest steak, which pairs beautifully with seasonal vegetables

This may seem an unusual way to cook steak, but a light touch preserves the integrity of the meat and produces the juiciest melt-in-the-mouth steaks you can imagine. The garnishes are very much a reflection of what is around at the moment, so feel free to substitute as you see fit.

(Serves 4)
For the steak:
450g good-quality aged hanger steak, well trimmed
5 tbsp salted butter, melted
Sea salt and black pepper

For the salad:
6 tomatoes of different shapes, colours and sizes, wedged and sliced
1 medium-sized head of fennel, thinly sliced
4 large bulb spring onions, sliced in half lengthways
3 tbsp roasted cashew nuts, chopped
6 tsp extra-virgin olive oil, for dressing

For the sauce:
½ bunch coriander, leaves picked and stalks discarded
½ bunch sorrel
¼ bunch parsley
4 spring onion tops, sliced
6-7 large, fresh mint leaves
½ seeded jalapeño pepper
500ml apple juice
Salt, to taste
Extra-virgin olive oil, for garnish

Season the steak well and bring to room temperature.

In a very hot non-stick pan, sear the meat on each side for 30 seconds, then remove from heat. Repeat this procedure six times, allowing the meat to rest in between, and reseason with a little sea salt each time. After the sixth time, let it rest and slice it into long, thin slices – it should be nice and pink, but warm all the way through. Season the steak again and coat with the melted butter.

Mix together the tomatoes, fennel and cashews, and season with salt, pepper and olive oil. Sear the spring onions in the steak pan until they brown but retain their crunch.

Blend all the sauce ingredients until smooth, then season and blend again.

On a large platter, arrange the meat on the sauce with the salad on top. Scatter over the grilled spring onions, drizzle with a little olive oil and serve.

Tuesday, July 26, 2016

Nigel Slater’s roast summer vegetables and herb mayonnaise recipe

Warm to the feel of summer with a delicious vegetable dish

The recipe

Trim 400g of young turnips and cut them in half. Scrub 200g of small carrots then cut them in half lengthways. Place the vegetables in a roasting tin with 2 tbsp of olive oil and 4 large peeled cloves of garlic, then add 4 sprigs of thyme. Season lightly, toss everything together then roast for about 30 minutes at 200C/gas mark 6 until golden and tender.

Combine 3 heaped tbsp of natural yogurt with the same amount of mayonnaise, 2 tbsp of chopped parsley and 1 of tarragon. Season and set aside.

Shred 150g of sugar snap peas and put them into the hot pan and fold into the other vegetables.

Place the vegetables on plates then spoon over the herb dressing. Serves 2.

The trick

The only turnips worth roasting are the sweet, early summer variety, no bigger than a golf ball. The older ones are better for casseroles and braising. Roasted, they can appear a little bitter. Cutting the turnips in half before roasting, gives a chance for the edges to toast appetisingly. Shake the pan every now and again during roasting to give the vegetables a chance to brown evenly.

The twist

Use young parsnips if you wish, or new potatoes instead of or as well as the turnips. For a summer salad allow the vegetables to cool completely, then toss them in the dressing for serving with cold roast meats.

Email Nigel at nigel.slater@observer.co.uk or follow him on Twitter @NigelSlater

Rachel Roddy’s fish with an almond and breadcrumb crust recipe

A simple Sicilian-style mix of breadcrumbs and almonds complements a wide array of recipes, but I find it’s best incarnation is as a crust for a fresh fillet of fish – serve with a tomato, caper and onion salad for a light summer supper

In the hope that this column is beginning to feel like a series, rather than string of unrelated episodes, I am starting where I left off last week, with breadcrumbs. More specifically, breadcrumbs with almonds, which makes them sound a bit fussy, though they aren’t. Quite the opposite in fact – a handful of crumbs, some chopped almonds and pinch of salt are easy and accommodating. Last week, I suggested toasting crumbs in olive oil, then putting them on pasta with slowly cooked courgettes, or their oversized Sicilian cousins, cucuzze. This week, I am going to return the idea to the place I borrowed it from, and suggest you put them on fish, which you then bake.

Swordfish with breadcrumbs and almonds was one of the first meals I ate during my first visit to Sicily 12 years ago. I was in Catania, at one of the trattoria that seem to appear from nowhere once the fish market closes down for the day and scrubs up well for the night. The appearance of that slice of swordfish, seeming slightly suffocated by its topping, surprised me – especially after the wild excitement of the theatrical fish market that morning. It was like meeting up with your grandma after a night out with friends. But it was delicious pleasing – I still remember the flavour. Lots more breadcrumbs and almonds followed – not always together – on that trip, and those that came after I hooked up with a Sicilian. Sicilians use breadcrumbs all the time; a resourceful habit born of necessity and the idea that you never, ever throw away bread, which is now part of the fabric of their cooking. I have picked up the habit; I always have a big bag of fine, dry breadcrumbs in the kitchen. They’re almost irritatingly good at everything: stuffing, puffing, coating, topping and a tool to stop things sticking.

So, the place I borrowed the idea from was a restaurant in a town called Scoglitti, which is 30 miles along the coast from us here in Gela. The owners’ daughter, who is part French, is absolutely fabulous, with her red lips, denim hotpants and ankle boots. There is not much room for manoeuvre; she tells us in a deep voice that rolls from her lips: “I know what you want.” And you don’t doubt it. The antipasti start arriving, little dish after little dish: an oyster each; peeled, blood-red prawns that are some of the most plump and pure I have ever eaten; slices of raw tuna and swordfish; cubes of octopus and butterflies of anchovy; enormous, yellow mussels stretching like acrobats across their shells; tiny clams called telline, tasting like a liquor made from sea water; sardines rolled up so they look like little fat birds; and spatola with almonds and breadcrumbs served with sweet onions. Spatola is a long, flat fish as silver and shiny as a newly minted coin. At markets and in shops spatola are often coiled, making them look a bit like a neat drawful of glittery belts. Ours were served as long fillets cut into short lengths, topped with breadcrumbs and almonds, then baked until the fish had fallen into delicate, but firm flakes, the crumbs a comfy crust. It was were one of the least showy dishes, but one we appreciated a lot, homely and good. My son stashed clamshells to take home in his pocket; I put the idea in mine.

I like it when a new idea, flung into the kitchen like a rubber ball, bounces around enthusiastically seeing where it fits, or doesn’t. First, there was pasta, then I used breadcrumbs and almonds to stuff aubergines and tomatoes, then came the fish: spatola, bream and mackerel. All three fish worked, but the mackerel was best: its thick, milky flesh is a good, sturdy match for the coarse, nutty crust. Fish and breadcrumbs need a foil, something to offer contrast: sweet, sour, salty, pungent. A salad of tomatoes, red onion and capers is a brilliant and typically Sicilian combination. If you wanted – or three more people turned up – you could bulk out the salad with bread too, or top it with some salted ricotta. Whatever fish you use, it all comes together quickly, but provides slow, good-flavoured food that satisfies but doesn’t sink you, which is what I ask for on these long, and fiercely hot, summer days.

Fish with a breadcrumb and almond crust

Serves 4
60g blanched almonds, chopped
1 unwaxed lemon
150g dry breadcrumbs
Salt and black pepper
A pinch of oregano (optional)
Extra virgin olive oil
4-8 fillets of fish (mackerel, bream, spatola, bass)

To serve
1 large red onion or several shallots
Vinegar
4 large ripe tomatoes
A handful of capers
Olive oil

1 Line a baking tray with greaseproof paper or foil and preheat the oven to 200C/400F/gas mark 6.

2 Peel and slice the onion into half moons, then soak for 20 minutes in water acidulated with 3 tbsp vinegar.

3 Mix the almonds, lemon zest and breadcrumbs with a pinch of salt, some pepper and the oregano, if using.

4 Brush the fillets with oil, then press the fillet side into the breadcrumb mix, so it is well coated. Lay the fillets skin-side down on the baking tray. Zig-zag with olive oil. Bake until cooked through and the crumbs are golden – which will take 10-15 minutes depending on the thickness of the fillets. – yYou need to keep an eye on them, and taste.

5 Chop the tomatoes over a plate to catch the juices. Drain the onion and capers, then mix with the tomatoes. Dress with olive oil and a pinch of salt, add a dash of vinegar if you like.

6 Serve the fish with the tomato salad and wedges of lemon.

  • Rachel Roddy is a food blogger based in Rome and the author of Five Quarters: Recipes and Notes from a Kitchen in Rome (Saltyard, 2015) and winner of the 2015 André Simon food book award

Monday, July 25, 2016

Anna Jones’s hearty grain salad recipes

A day of marching through meadows and soaking in the sea works up an appetite few flimsy salads can master. Introduce a fistful of grains to your summer salads to keep your summer adventures going

I am writing from a cabin in the hills of north Wales. I’m looking out over a meadow, and it’s so hot there is a haze hovering just above the long grasses. The air is dense and filled with the smell of the grasslands, which roll down into the valley in front of the cabin. It’s the kind of weather that I dream of all winter. All I want to eat is a cold, fresh salad with a hit of citrus and spikes of chilli, washed down with an ice-cold beer or rosé.

But, leaves won’t quite fill us up after a day walking in the hills and jumping in the sea. So it’s grain salads I’ve been packing into pots and taking to the beach, along with punnets of cherries and strawberries ...

Wholegrains make up a big part of my cooking. Like fruit and veg, I vary them as much as possible to derive the maximum amount of pleasure, interest, flavour and nutrients from my food. At home, I like to cook them in big batches and have them close at hand in my fridge or freezer. These two salads centre around an old favourite – brown rice – and a more unusual grain – freekeh.

Crispy rice salad

This is an amazing salad based on one I ate at Sqirl, an incredible neighbourhood cafe in LA. It is one of those places where you want every single thing on the menu, right down to the drinks. On my last trip to LA, I ate there five times. This is a play on what was my favourite thing on the menu.

This recipe requires you to cook your rice three times, which may seem labour-intensive for a salad, but it’ll create perfect little pops of crunch against the rest of the salad. This is a great way to use up leftover rice too – just skip the first cooking stage. It’s also really good topped with a softly poached egg, or some feta and flatbreads if you are hungry.

Serves 2-4
100g basmati rice (I use brown)
300g spring greens
Zest and juice of 1 unwaxed lemon
Salt and black pepper
3 spring onions
2 tbsp coconut oil
6 medjool dates

For the dressing
Zest and juice of 1 unwaxed lime
1 tbsp sumac (optional)
2 tbsp extra virgin olive oil
1 tsp runny honey

1 Cook the rice in a small saucepan of boiling salted water until tender – this will take around 10–15 minutes for white basmati and 20-25 for brown.

2 Meanwhile, pull the spring green leaves from their stems. Shred them with a knife, or tear them into small pieces with your hands. Put the leaves into a bowl, then add the zest and juice of the lemon and a good pinch of salt. Scrunch it in your hands for a minute to break it down a little. Chop the spring onions finely and add them to the bowl.

3 Once the rice is cooked, drain it well. Put a large frying pan on the heat and, when it’s hot, add the rice with no oil and dry-fry for 2 minutes to get rid of any moisture.

4 Remove the rice from the pan, then put the pan back on the heat, add half the coconut oil at a time and fry the rice again in two batches until it starts to turn light brown and really crisp. Drain on kitchen paper and sprinkle with salt.

5 Now, make your dressing. Put the zest and juice of the lime into a screwtop jar with the sumac, if using, and 2 tbsp olive oil. Add the honey and a pinch of salt and pepper. Put on the lid and shake to combine.

6 De-stone and roughly chop the dates, then add them to the greens. Once the rice is almost cool, add it to the spring greens and toss it all in the dressing.

Freekeh Salad
Freekeh salad Photograph: i for the Guardian

Warm fennel, green olive and herb freekeh

Freekeh is a kind of green wheat, harvested just before it’s ripe. It’s sun-dried and then set on fire, so the chaff burns but the seeds themselves remain. The wheat is then threshed and rubbed, hence its name (which means “rubbed”). It adds texture and substance to a salad, and a nutty, smoky taste, but you can use it for sweet dishes too. In Lebanon, it is sometimes eaten for breakfast in place of porridge.

Here the freekeh is tossed with roasted fennel and leeks and big fat green olives, chopped with green herbs, to make a vibrant dressing. It all comes together to make a hearty, but bright, lunch or supper. It also tastes amazing the next day.

Serves 4
200g freekeh
2 fennel bulbs, trimmed and thinly sliced, leafy tops reserved to garnish
2 leeks, washed and thinly sliced
2 courgettes, sliced
4 garlic cloves, peeled
1 tbsp coriander seeds
Salt and black pepper
Extra virgin olive oil
A splash of herb or white wine vinegar
A small bunch each of mint, coriander and flat-leaf parsley, finely chopped
150g green olives, rinsed then pitted
6 tbsp extra-virgin olive oil
100g almonds, toasted and chopped
1 fresh red chilli, deseeded and roughly chopped
2 tbsp freshly squeezed lemon juice, plus more to taste
1 bunch of fresh parsley or basil
1 tbsp pul biber (crushed red pepper flakes) or ½ tsp red chilli flakes

1 Soak the freekeh in cold water for 20 minutes. Preheat the oven to 180C/350F/gas mark 4.

2 Put the fennel, leeks, courgette and garlic on a baking tray in one layer if you can – use 2 trays if you have to. Sprinkle over the coriander seeds and a good amount of salt and black pepper, then drizzle with olive oil. Roast in the oven for 20-30 minutes, removing the trays from the oven and carefully shaking them every now and then, until the vegetables are cooked through and crisp around the edges.

3 Sprinkle the vinegar over the vegetables as soon as they come out of the oven, then set aside to cool. When cool, scatter the finely chopped herbs over the top.

4 Drain the soaked freekeh and add to a saucepan with 750ml cold water and ½ tsp salt. Put on a medium heat, cover and bring to a boil, then lower the heat to simmer it gently for about 12 minutes. Cook until tender, but not so long that the grains become mushy. Drain off any extra water, and set aside to cool.

5 Coarsely chop the olives and put them in a bowl along with the olive oil, almonds, chopped fresh chilli, and lemon juice. Stir well and set aside until ready to serve the salad.

6 Combine the roasted veg, freekeh, pul biber and olive mixture in a bowl and mix well. Taste and adjust with salt, lemon juice or olive oil, if needed. Garnish with the fennel tops.

  • Anna Jones is a chef, writer and author of A Modern Way to Eat and A Modern Way to Cook (Fourth Estate); annajones.co.uk; @we_are_food

Sunday, July 24, 2016

Nigel Slater's summer pie recipes

Don’t think a double crust is just for winter – bronzed pastry over rabbit or fruit is perfect for this time of year

The idea is, I suppose, that tarts are more suited to summer, pies to winter. An open topped pastry case is the ideal opportunity to show off slices of knobbly, seasonal tomatoes or an OCD arrangement of summer berries. A pie’s second layer of pastry will satisfy our winter need for the comfort of golden dough. And yet we happily bring out a pork pie at a July picnic or eat an open-topped tarte tatin on a wet weekend in February. And as much as I like the visual appeal of a tart, it is that extra layer of pastry that gets my vote rain or shine.

All of which may explain why, with the sun high in the sky, I found myself making a double-crusted rabbit and tarragon pie. It’s a short hop from steak and kidney yet the white meat and green herbs planted it firmly in the summer eating category. I skirted the rabbit’s tendency to dryness by browning the meat then poaching it in stock with shallots and thyme. That stock ended up as the heart and soul of the filling, thickened with butter and flour.

This week also saw an apricot pie on the table, made with pastry so soft it hugged the shape of the fruit, giving the impression of a cluster of apricot dumplings. I included lemon zest in the pastry that brought out the fruit’s characteristic shyness. Long live the double crust.

Rabbit, chicken and tarragon pie

If rabbit isn’t your thing, then use chicken instead, making sure a generous proportion of it is brown leg and thigh meat. You will need a deep pie dish approximately 30x20cm.

Serves 6
For the pastry:
plain flour 200g
lard 50g
butter 50g
egg 1, beaten

For the filling:
olive oil 4 tbsp
wild rabbit meat 1.2kg, prepared but on the bone
chicken thighs 2, skinned
shallots 200g, small
button mushrooms 150g
carrots 200g, small
thyme 10 sprigs
butter 50g
plain flour 50g
stock 700ml (from cooking the rabbit)
parsley 4 tbsp, chopped
tarragon 2 tbsp, chopped
egg a little, beaten

Make the pastry: put the flour into the bowl of a food processor, add the lard and butter, cut into small pieces, then process to coarse crumbs.

Add the egg to the mixture and enough cold water to give a firm but rollable dough. Roll into a thick, fat cylinder, wrap in clingfilm and chill for 20 minutes.

Warm the oil in a large, wide pan over a moderate heat. Add the rabbit and chicken pieces, browning on both sides and removing to a large casserole as they become ready. Peel the shallots and colour lightly in the oil in which you browned the meat, then add the mushrooms, cut in halves or quarters, as you think fit. When they are golden, transfer the mushrooms and shallots to the rabbit pan, then pour over 2 litres of water and bring to the boil. Peel the carrots and halve them lengthways. Add the thyme sprigs and lower the heat. Let everything simmer for an hour with the occasional stir, adding the carrots halfway through the cooking time.

Remove the chicken and vegetables with a draining ladle and transfer to a deep pie dish. Leave the stock simmering while you tear the meat from the bones into large pieces.

Melt the butter in a heavy pan, add the flour and cook over a moderate heat, stirring, for a couple of minutes. Pour in 700ml of the stock and stir until you have a thickish gravy. Add the meat, vegetables and chopped herbs, check the seasoning, then tip into a deep-sided baking dish.

Slice the pastry into ½cm thick discs, then lay them, slightly overlapping, over the filling. Brush with a little beaten egg and bake for 40 minutes or so, until golden.

Apricot pie

Globes of bronzed pastry, broken in one corner to reveal apricots beneath
Fruit dumplings: apricot pie. Photograph: Jonathan Lovekin for the Observer

My favourite pastry is very soft and a little fragile to handle. I get round this by kneading the dough, briefly and tenderly, on a lightly floured wooden board before rolling.

Serves 6
For the pastry:
butter 150g
golden caster sugar 150g
egg 1
lemon grated zest of 1 small one
plain flour 250g
baking powder 1tsp
milk and sugar a little to finish

For the filling:
apricots 750g, ripe ones
caster sugar 2tbsp
orange grated zest of 1 small one
cornflour 1 heaped tbsp

Cream the butter and sugar until light and fluffy. Mix in the egg, then the lemon zest. Sift in the flour and baking powder and fold into the butter and sugar mixture. Form the dough into a ball and knead lightly on a floured surface then cut in half. Wrap in clingfilm and rest in the fridge for half an hour. Use half of the dough to line a buttered 24cm metal pie plate. Place this, and the remaining half, in the fridge.

Set the oven at 180/gas mark 4. Halve the apricots and remove their stones. Put the apricots in a bowl, toss with the sugar, orange zest and cornflour, then spoon on to the pie lining. Roll the reserved pastry to fit the top. Brush the rim of the pastry in the pie plate with milk, then lower on the pastry top. Seal the edges, pressing or pinching them together, then brush the pie with milk and dust with sugar. Pierce a small hole in the centre to let the steam out. Bake for 45 minutes or so until the crust is pale gold. Leave to settle for 10-15 minutes before serving.

Email Nigel at nigel.slater@observer.co.uk or follow him on Twitter @NigelSlater

Claire Ptak’s recipe for nectarine and cherry cobbler

A little sugar brings out the syrupy side of summer’s stone fruits. Here, macerated nectarines and cherries lend their sweetness to a portable cobbler, or are simply served in wine glasses and topped up with Beaujolais

Summer is the time for macerating. I love this term. By sprinkling sliced or chopped fruits with sugar, and allowing them to sit for a period of time, we tenderise them and allow them to steep, almost like a tea, in their own juices. The process draws a lot of liquid, flavour and nuance from the fruit and, mixed with the sugar, makes them delicious and syrupy. Then they are ready to use.

There’s something about a balmy summer evening makes me want a delicious light rosé or red wine. The French do it right by lightly macerating peaches, strawberries or – my favourite – nectarines in a little sugar, then covering them with wine as a dessert. Use the same wine you have been drinking for the meal: a gamay (the grape variety used in Beaujolais) is always good.

Just when you thought you’d had every iteration of cobbler, here comes another. This is a very portable one that I adore. I call it top-and-bottom cobbler, because of its base, which allows you to eat it as you would a slice of pizza. Brilliant.

Nectarine and cherry top-and-bottom cobbler

Serves 6
115g unsalted butter, softened
100g granulated sugar
1 tsp fine sea salt
2 eggs
280g plain flour
1 tsp baking powder
120ml milk

For the filling
3-4 nectarines, cut into eighths
200g cherries, pitted and halved
100g brown sugar
1 tsp lemon juice

For the topping
210g plain flour
1 tbsp sugar
1 tbsp baking powder
½ tsp fine sea salt
150g butter, cut into 1cm pieces
1 egg
60ml milk
45g demerara sugar

1 Butter and line a 20x30cm baking dish with parchment. Preheat the oven to 180C/350F/gas mark 4.

2 For the base, cream together the butter, sugar and salt until light and fluffy. Add the eggs, one at a time, until incorporated.

3 Whisk together the flour and baking powder. On a stand mixer fitted with a paddle attachment, add half of the flour to the butter and sugar. Once mixed, add half the milk, followed by the remaining flour, then the remaining milk.

4 Mix until smooth, but not overmixed. Spread the bottom mixture into your prepared tin, and smooth the top with a spatula.

5 For the fruit filling, toss together the nectarines, cherries, sugar and lemon juice. Leave to macerate while you prepare the topping.

6 For the topping, add the flour, sugar, baking powder and salt into the bowl of a food processor. Pulse to combine. Add the butter and process until the mixture has a sandy texture. Add the egg and milk at once, and pulse a few times to bring the dough together.

7 The fruit should now be well macerated. Toss it again in the sugar, then tip the fruit and any juice over the prepared base, spreading out the mixture evenly.

8 Drop spoonfuls of the topping mixture over the fruit, leaving some of it exposed to create a cobbler effect. Sprinkle with demerara and bake for 25-30 minutes, or until golden and cooked through.

Nectarines in wine
A nice hit from a simple punch: Use the same wine you have been drinking for the meal. Photograph: Kristin Perers for the Guardian

Nectarines in wine

Serves 6
4 ripe nectarines
Sugar, to taste (begin with 2 tbsp)
375ml Beaujolais wine

1 Slice the nectarines into bite-size pieces and put in a glass bowl or serving dish large enough also to hold about half a bottle of wine. Sprinkle over the sugar, toss with a spoon, then taste for sweetness. You are looking to bring out the flavours in the nectarines without making them too sweet. If you feel the nectarines could use a little extra sugar, add more by the teaspoonful until you are happy. Leave for at least 30 minutes and up to 3 hours to macerate. If it is a very warm day, put them in the fridge.

2 Just before serving, pour over the wine, then stir.

3 Spoon the fruit and wine into serving glasses – these could be wine glasses or simply tumblers.

  • Claire Ptak is an author and food stylist and owns Violet Bakery in London. She is the author of the Violet Bakery Cookbook (Square Peg); @violetcakeslondon

Saturday, July 23, 2016

Readers’ recipe swap: Turmeric

Makes a mess, but turmeric brings intrigue and depth to the kitchen... Take part in our next theme, KIDS’ PARTIES! Upload: theguardian.com/witness; email: recipes@theguardian.com; Instagram: @guardian_cook by noon on Wednesday 31 March.

As a powder, turmeric is by far the prettiest spice out there, which is a good thing, because six recipes later, my kitchen, and all my kitchen tools, are indelibly stained a bright persimmon orange.

Turmeric is part of the ginger family. Plants have lush, waxy leaves and many dark pink flowers arranged in a stack, pineapple style. It can be dried and ground, pickled, grated and boiled, both in sweet and savoury situations.

Cooking with the fresh rhizome – more slender than ginger’s knobbly girth, and altogether bolder in colour – was revelatory. When first cut, the juice coats your knife with a glue that’s as persistent as the ink it yields. And it’s really fruity, in a way that the spice in powdered form simply does not prepare you for.

The winning recipe: Chocolate mousse with turmeric and orange

The surprising success of turmeric in a sweet! Chilli and chocolate might be a known quantity, but Fadime Tiskaya’s addition of the golden root takes it somewhere entirely new. It’s fruity, crunchy, juicy and as spiced as hot sauce.

Serves 4-6
For the syrup
30ml water
45g caster sugar
Peel of 1 orange, thinly sliced
10g fresh turmeric, peeled and finely chopped

For the mousse
175g dark chocolate, broken into pieces
5g fresh turmeric, grated
½ tsp ground turmeric
¼ tsp cayenne pepper
3 large eggs, separated
3 tbsp caster sugar
1 tbsp icing sugar, sifted
175g double cream
Fresh cherries, stoned, to serve

1 For the syrup, put the water and sugar in a small pan and bring to the boil until the sugar dissolves completely. On a low heat, add the orange peels and turmeric, let it boil for about 5 minutes, then set aside.

2 Put a heatproof bowl over a pan with simmering water in it, ensuring that the bottom of the bowl doesn’t touch the water. Put the chocolate into the bowl, add your fresh and ground turmeric, as well as the cayenne pepper, and let it all melt together.

3 Meanwhile, whisk the egg yolks with caster sugar until smooth. In a separate bowl whisk the egg whites with the icing sugar until it’s stiff.

4 Turn the heat down under the chocolate, add the egg yolks and quickly whisk until combined and the mix has a thick consistency, then add the double cream and continue to whisk.

5 Next, add the syrup and whisk to combine. Take off the heat and fold in the egg whites, then pour into individual serving bowls. Let it rest in the fridge for 30-60 minutes, add your cherries and serve.

Channa dal hummus

Eating this, you do wonder why ColonialCravings’s innovative twist isn’t the default setting for a tub of the chickpea classic: these are naturally kindred flavours.

Colonial Cravings’ channa dal hummus – but spiced with turmeric.
Colonial Cravings’ channa dal hummus – but spiced with turmeric. Photograph: ColonialCravings/GuardianWitness

Serves 4
½ red onion, diced
2 tbsp olive oil
1 garlic clove, crushed
2 tsp fresh ginger, grated
½ tsp chilli flakes
¼ tsp ground turmeric
¼ tsp kasuri methi (dried fenugreek leaves)
¼ tsp ground cumin
½ tsp mustard seeds
1 tomato, diced
400g tin of chickpeas, drained
Salt and lemon juice, to taste

1 Gently fry the onion in a little of the olive oil until it is tender and starting to colour. Add the garlic to the pan along with the ginger and spices, then fry for a few seconds.

2 Mix in the tomato and continue to cook for a few minutes more over a moderate heat, ensuring you don’t burn the garlic or the spices.

3 Put the chickpeas, the onion mix and the rest of your oil in your food processor, then blitz until you are happy with the consistency.

4 Season with salt and lemon juice to taste, then thin out with a little water if the hummus is too thick for your liking.

Golden milk

Mehrunnisa Yusuf remembers being given mugs of haldi doodh, or turmeric milk, whenever a sore throat befell her as a child. It’s a remedy she now makes for her husband, albeit with a few contemporary – and in my view, entirely welcome – flavour additions.

Serves 1
A small stick of cinnamon
2 green cardamom pods
250ml milk
1 tsp ground turmeric
½ tsp orange blossom water
Honey, to taste

1 Put the whole spices and milk in a saucepan. Bring to a boil and then simmer for 1-2 minutes.

2 Stir in the ground turmeric and orange blossom water. Strain the infused milk into a mug. Sweeten, as desired, with honey.

Malaysian turmeric fried chicken

Rachel Kelly, this is some fine fried chicken you’ve made. Turmeric and poultry, or ayam kunyit, is a pairing that always works, especially in this umami, Asian setting.

Serves 3-4
8 chicken legs
3cm piece of fresh turmeric, finely chopped (or 2 tsp ground turmeric)
2 tbsp soy sauce
1 tsp light brown sugar
A pinch of salt
½ tsp black pepper
1 red onion, chopped
3-4 tbsp vegetable oil, for frying

1 Make sure the chicken pieces are dry - pat them with paper kitchen towel to remove any excess moisture.

2 Combine the turmeric with the soy sauce, sugar, salt and pepper. Rub the mixture over the chicken pieces. Sprinkle with the chopped onion, then stir well to combine. Set aside to marinate for at least 30 minutes at room temperature.

3 Heat 3-4 tbsp oil in a wok or large frying pan over a high heat. Add the chicken pieces and stir-fry on high for about 5 minutes until browned all over. Turn the heat down to medium and continue to cook for another 10 minutes or until the chicken is crisp, browned and cooked through.

4 Put the chicken on a wire rack over a baking sheet to drain and rest for a few minutes. Serve while still hot.

Saag paneer

To add depth and richness to a rather excellent sauce, Heidi Gough uses just a touch of ground turmeric – and often that’s really all you need.

Heidi Gough’s saag paneer with turmeric is a very adaptable spicy supper.
Heidi Gough’s saag paneer with turmeric is a very adaptable spicy supper. Photograph: HGough/GuardianWitness

Serves 2
100g paneer
2 tsp gram (chickpea) or plain flour
2 tbsp oil

For the sauce
1 tsp oil
½ onion, finely chopped
A pinch of ground cumin
1 tsp fresh ginger, finely chopped
1 garlic clove, finely chopped
½ tsp ground coriander
½ tsp turmeric
1 dried chilli
200g tinned chopped tomatoes
100ml water
2 tsp mango chutney
50g fresh spinach
½ tsp garam masala
A handful of fresh coriander
A pinch of salt, to taste

1 First, make the sauce. Fry the onion in 1 tsp oil until it begins to brown. Then add the cumin, ginger, garlic, ground coriander and turmeric to the pan, crumble in the chilli and give it all a stir. Add the tomatoes, water and chutney. Let this simmer for 10 minutes, adding further water if needed. It should be reasonably thick by the end of the cooking time.

2 Meanwhile, cut the paneer into cubes and dust with the flour. Fry the dusted paneer in the oil until browned, then drain for a couple of minutes on kitchen roll.

3 Once the sauce cooking time is up, add the spinach and fried paneer, with a little water if needed. Bubble away until the spinach has wilted and cooked and the paneer heated through.

4 When it’s ready, stir in the garam masala, coriander and a little salt, if liked. Serve with rice or chapatis.

Turmeric potatoes with spinach

David Nelson roasts the grated rhizome in oil, which allows the colour to get to work beautifully. I’d make these roast potatoes even without the spinach and the yoghurt.

Serves 4
800g floury potatoes
6 banana shallots, peeled and sliced lengthways
3 tsp ground turmeric
2 tsp sweet paprika
1½ tsp chilli flakes
1 tsp ground cumin
1 tsp garlic, crushed
4 tbsp groundnut oil
½ tsp fresh turmeric, grated
1 tsp mustard seeds
½ tsp coriander seeds
Salt, to taste
2 large handfuls of spinach

To serve
100ml goat’s yoghurt
A handful of fresh coriander

1 Heat the oven to 200C/400F/gas mark 6. Cut the potatoes into large pieces and cook in a deep pan of salted water till approaching tender. Drain in a colander. Give them a slight shake. Put them in a bowl and add the shallots.

2 Mix together the ground turmeric, paprika, chilli flakes, ground cumin and garlic, then sprinkle over the potatoes and shallots. Mix slowly and gently with a large spoon.

3 Add 1 tbsp of the groundnut oil to a pan and throw in the grated fresh turmeric, mustard and coriander seeds. Put in the oven for 10 minutes.

4 Remove the baking tray. Spoon the seeds to one side, then gently add the potatoes and shallots. Spoon the seeds over the potatoes and add the remaining groundnut oil.

5 Sprinkle with sea salt flakes, to taste, and return the tray to the oven until golden and crisp.

6 Put the spinach in a pan with the lid on a medium heat for 1-2 minutes or just until it wilts. Remove the spinach from the heat and gently toss it with the potatoes and shallots. Add 1 tbsp yoghurt and some torn coriander and serve.A

Claire Ptak’s recipe for nectarine and cherry cobbler

A little sugar brings out the syrupy side of summer’s stone fruits. Here, macerated nectarines and cherries lend their sweetness to a portable cobbler, or are simply served in wine glasses and topped up with Beaujolais

Summer is the time for macerating. I love this term. By sprinkling sliced or chopped fruits with sugar, and allowing them to sit for a period of time, we tenderise them and allow them to steep, almost like a tea, in their own juices. The process draws a lot of liquid, flavour and nuance from the fruit and, mixed with the sugar, makes them delicious and syrupy. Then they are ready to use.

There’s something about a balmy summer evening makes me want a delicious light rosé or red wine. The French do it right by lightly macerating peaches, strawberries or – my favourite – nectarines in a little sugar, then covering them with wine as a dessert. Use the same wine you have been drinking for the meal: a gamay (the grape variety used in Beaujolais) is always good.

Just when you thought you’d had every iteration of cobbler, here comes another. This is a very portable one that I adore. I call it top-and-bottom cobbler, because of its base, which allows you to eat it as you would a slice of pizza. Brilliant.

Nectarine and cherry top-and-bottom cobbler

Serves 6
115g unsalted butter, softened
100g granulated sugar
1 tsp fine sea salt
2 eggs
280g plain flour
1 tsp baking powder
120ml milk

For the filling
3-4 nectarines, cut into eighths
200g cherries, pitted and halved
100g brown sugar
1 tsp lemon juice

For the topping
210g plain flour
1 tbsp sugar
1 tbsp baking powder
½ tsp fine sea salt
150g butter, cut into 1cm pieces
1 egg
60ml milk
45g demerara sugar

1 Butter and line a 20x30cm baking dish with parchment. Preheat the oven to 180C/350F/gas mark 4.

2 For the base, cream together the butter, sugar and salt until light and fluffy. Add the eggs, one at a time, until incorporated.

3 Whisk together the flour and baking powder. On a stand mixer fitted with a paddle attachment, add half of the flour to the butter and sugar. Once mixed, add half the milk, followed by the remaining flour, then the remaining milk.

4 Mix until smooth, but not overmixed. Spread the bottom mixture into your prepared tin, and smooth the top with a spatula.

5 For the fruit filling, toss together the nectarines, cherries, sugar and lemon juice. Leave to macerate while you prepare the topping.

6 For the topping, add the flour, sugar, baking powder and salt into the bowl of a food processor. Pulse to combine. Add the butter and process until the mixture has a sandy texture. Add the egg and milk at once, and pulse a few times to bring the dough together.

7 The fruit should now be well macerated. Toss it again in the sugar, then tip the fruit and any juice over the prepared base, spreading out the mixture evenly.

8 Drop spoonfuls of the topping mixture over the fruit, leaving some of it exposed to create a cobbler effect. Sprinkle with demerara and bake for 25-30 minutes, or until golden and cooked through.

Nectarines in wine
A nice hit from a simple punch: Use the same wine you have been drinking for the meal. Photograph: Kristin Perers for the Guardian

Nectarines in wine

Serves 6
4 ripe nectarines
Sugar, to taste (begin with 2 tbsp)
375ml Beaujolais wine

1 Slice the nectarines into bite-size pieces and put in a glass bowl or serving dish large enough also to hold about half a bottle of wine. Sprinkle over the sugar, toss with a spoon, then taste for sweetness. You are looking to bring out the flavours in the nectarines without making them too sweet. If you feel the nectarines could use a little extra sugar, add more by the teaspoonful until you are happy. Leave for at least 30 minutes and up to 3 hours to macerate. If it is a very warm day, put them in the fridge.

2 Just before serving, pour over the wine, then stir.

3 Spoon the fruit and wine into serving glasses – these could be wine glasses or simply tumblers.

  • Claire Ptak is an author and food stylist and owns Violet Bakery in London. She is the author of the Violet Bakery Cookbook (Square Peg); @violetcakeslondon

Yotam Ottolenghi’s recipes for eating outdoors (or in)

Make the most of summer, come rain or shine

When we were testing today’s dishes a couple of months ago, I hadn’t the foggiest idea what commotions summer had in store. Unprecedented political storms and plenty of more predictable meteorological storms have made the prospects of jolly garden parties and frivolous picnics slightly less realistic than I had hoped, which isn’t ideal. For me, at least, it’s hard to muster the good cheer you need for a day outside when the skies are grey.

Fortunately, though, these dishes have an inbuilt versatility: sure, they’re all highly portable and designed to be consumed outdoors, but they all work perfectly well served warm indoors, too. So, whether you’re having a bright day or a gloomy moment, you can make any of them fit your mood.

Sesame prawn toasts

If you’d rather not make your own sweet chilli sauce, which I highly recommend, just use a decent brand instead. If, however, you do choose to make your own, you’ll have more than you need for these toasts. Put the excess in a sealed container and keep it in the fridge, where it will last a good few weeks: it’s a great dip for fried seafood, chicken or tofu. Pre-sliced supermarket white bread works best here, which is not something you’ll catch me saying all that often. Serves four as a snack or starter (makes 20 toasts).

350g shelled raw prawns
4 spring onions, finely chopped
20g coriander stalks, finely chopped
1½ tsp Szechuan pepper, finely ground
2 sticks lemongrass, outer layer removed, the rest finely blitzed in a spice grinder (leaving you 1 tbsp-worth)
3cm piece fresh ginger, peeled and finely chopped
1 egg, lightly whisked
1 tbsp sesame oil
1 tbsp fish sauce
1 tbsp light soy sauce
4 tbsp cornflour
1 tbsp white sesame seeds
2 tsp black sesame seeds (or use more white, if you can’t get black)
1 tsp aleppo chilli flakes (or ½ tsp regular chilli flakes)
5 slices medium-thick sliced white bread, crusts left on
140ml sunflower oil, for frying

For the sweet chilli and ginger sauce
200g caster sugar
180ml rice vinegar
60ml fish sauce
6 fresh kaffir lime leaves
4 red chillies, 2 deseeded, 2 left whole, all finely chopped
4cm piece fresh ginger, peeled and finely chopped
1 small garlic clove, peeled and crushed
1½ tsp lime juice

First make the sauce. Put the sugar, vinegar, fish sauce and lime leaves in a medium saucepan, bring to a boil and leave to bubble for five to six minutes, until it turns into a syrup. Take off the heat, add the chopped chilli, ginger and garlic, and leave to cool. Once cool, stir in the lime juice and refrigerate.

Put the prawns, spring onions, coriander, Szechuan pepper, lemongrass, ginger, egg, sesame oil, fish sauce, soy sauce and cornflour in the bowl of a food processor and blitz for a minute, until thick and gluey.

Combine all the sesame seeds and the chilli flakes in a small bowl and cut each slice of bread into four squares. Spread about one and a half tablespoons (30g) of the prawn mix over one side of each square of bread – you want a layer as thick as the bread itself – then put the bread prawn side up on a plate. Once all the bread is spread with prawn paste, sprinkle generously with the sesame seed mix (about a quarter-teaspoon per bread square).

Heat three tablespoons of oil in a large frying pan on a medium-high flame. Lay in five prawn toasts prawn side down and fry for a minute, until the topping is cooked through and the seeds are golden-brown. Turn over and fry for 45-50 seconds, until the bread is golden-brown, then transfer to a plate lined with kitchen towel and keep warm. Add two more tablespoons of oil to the pan and, once hot, repeat with the next batch of toasts. Repeat with the remaining toasts and oil, then serve warm or at room temperature, with the sauce for dipping alongside.

Lamb arayes with tahini and sumac

These meat-stuffed pockets are popular snacks throughout the Levant. Thanks to Sami Tamimi for the recipe. Serves four to six.

10 plain or corn tortillas (20cm wide)
75ml olive oil, plus 2 tsp for brushing
1 tbsp sumac

For the filling
250g lamb mince
250g beef mince
½ small onion, peeled and coarsely grated
2 tomatoes, coarsely grated (skin discarded)
¾ tsp ground allspice
¼ tsp ground cinnamon
90g tahini paste
2 garlic cloves, peeled and crushed
2 tsp pomegranate molasses
10g mint leaves, finely shredded
15g parsley leaves, finely chopped
60g mature cheddar, coarsely grated
Salt

In a large bowl, mix all the filling ingredients except the cheese, with a teaspoon of salt. Working with one tortilla at a time, spoon 100g of filling over one half of the tortilla, leaving a 0.5cm border around the edge. Lightly sprinkle cheese on top of the meat (about 6g per tortilla), then fold the tortilla into a semi-circle and press down gently, so the meat is evenly spread and about 1-1.5cm thick. Repeat with the remaining tortillas and filling.

Heat a tablespoon of oil in a large, nonstick frying pan on a low-medium flame. Lay in two folded tortillas at a time, and fry gently for two to three minutes. Turn over, cook for two to three minutes, until the tortilla is golden-brown on both sides and the meat is cooked through, then transfer to a plate lined with kitchen towel. Wipe clean the pan with kitchen towel and repeat with the other tortillas and oil.

Mix the remaining two teaspoons of oil with the sumac, and brush all over the tops of the cooked arayes. Serve warm or at room temperature.

Marinated beetroot with egg and smoked mackerel

Yotam Ottolenghi’s marinated beetroot with egg and smoked mackerel.
Yotam Ottolenghi’s marinated beetroot with egg and smoked mackerel. Photograph: Louise Hagger for the Guardian. Food styling: Emily Kydd. Prop styling: Jennifer Kay

The eggs are more or less soft-boiled here, so things could get a bit messy if you’re planning to eat them outdoors; if you’d rather minimise the potential mess, by all means cook them for two to three minutes longer. And if you’re taking this on a picnic, keep the eggs separate from the salad until just before serving, otherwise the eggs will be stained by the beetroot. Don’t feel you have to use smoked mackerel, either: smoked salmon fillets work really well, as does smoked eel, which is what I’d use for preference, though it is more expensive. If you go down that route, however, make sure your eel comes from a producer such as the Severn & Wye Smokery, which is part of the Sustainable Eel Group and guarantees its eel is sourced responsibly. Serves six.

12 small beetroots, scrubbed clean but unpeeled, leaves and stalks discarded
60ml olive oil, plus extra to serve
1½ tbsp cider vinegar
1 tsp maple syrup
½ tsp cumin seeds, toasted and lightly crushed
2 tsp coriander seeds, toasted and lightly crushed
¼ tsp chilli flakes
Flaky sea salt and black pepper
6 large eggs
2 tsp lemon juice
100g watercress
5g tarragon leaves
4 smoked mackerel fillets, skinned and broken into 2-3cm flakes

Heat the oven to 200C/390F/gas mark 6. Mix the beetroot in a bowl with a tablespoon of oil and a teaspoon of salt. Transfer to a medium oven tray lined with baking paper and roast for a hour, until soft. Set aside to cool for 15 minutes, then peel (kitchen gloves or washing-up gloves will prevent your hands turning purple). Cut the beetroots into 1.5cm-thick wedges, then put in a bowl with two tablespoons of oil, the vinegar, maple syrup, cumin, coriander, chilli and half a teaspoon of salt, and leave to marinate for 30 minutes.

Bring a medium saucepan of water to a boil, lower in the eggs and boil for five minutes. Drain, refresh and, when they’re just cool enough to handle, peel. Leave to cool if serving later, or keep warm if serving at once.

In a big bowl, whisk the remaining tablespoon of oil, the lemon juice, a quarter-teaspoon of salt and a good grind of pepper. Add the watercress and tarragon, and toss. Add the fish and beetroot, toss gently, then transfer to individual bowls (or to a container, if you’re taking the salad on a picnic).

To serve, break or cut each egg in half over each portion, so the yolk drips over it, place on top, then drizzle over extra oil, if you like.

Yotam Ottolenghi is chef/patron of Ottolenghi and Nopi in London.